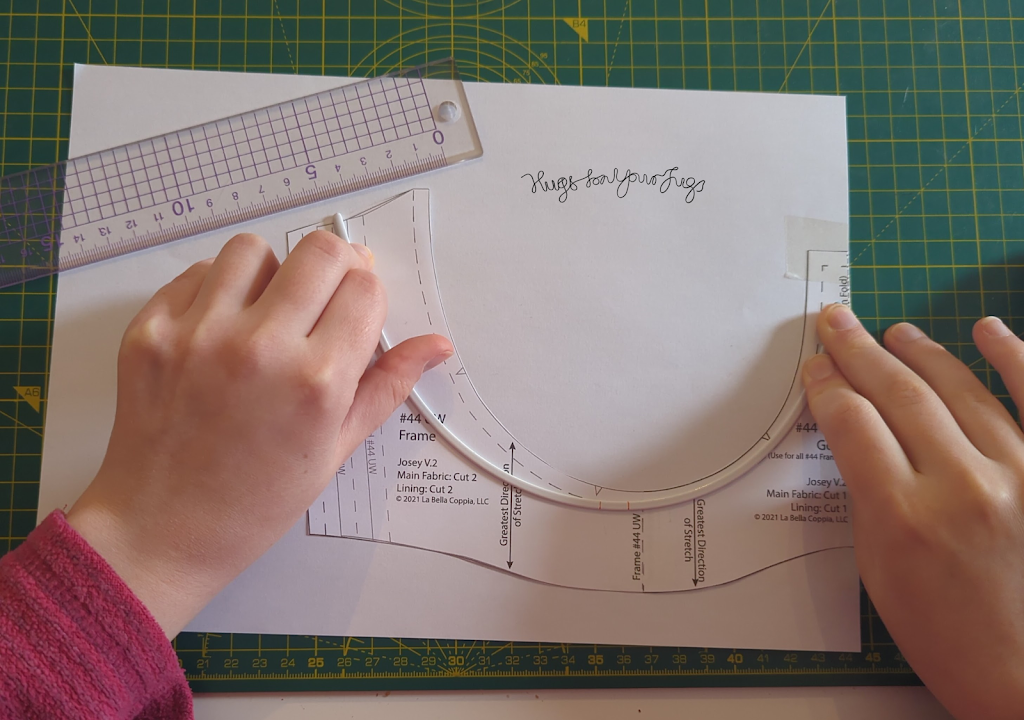
I’m here with an actual tutorial for once so get your drafting stationery ready! It is my personal belief that a lot of us struggling bra makers should be increasing the spring on our bras, especially in larger wire sizes. Spring is, in short, the distance between the wire at rest and the cradle the wire fits into.
Using a spring-conscious approach has been the final puzzle piece in fitting bra bands onto myself and clients with high rates of success. What I mean by spring conscious is the understanding that each wire size/type/firmness needs a different amount of spring, as well as the understanding that certain cradle and band alterations also impact this amount. As designers often use a set amount of spring for each wire, their bands may be relatively successful for smaller wire sizes but fail in larger ones. Today I will show you the basics of how to increase the spring in your cradle. In the extended version, I go over some nuances of springing larger wires as well as ensuring your new cradle fits well into the band.
Symptoms of a lack of spring
Wire Symptoms
- Pain in the gore tip and outer wire tip (including over the course of the day)
- Alternatively, the wire tip floating out and poking into your arms (it depends a bit on the stiffness of the wire and some other factors)
- Pain in the bottom of the wire, like it’s digging into your ribs
- Feeling like the bottom outer wire corner is floating, or alternatively feeling like it’s sitting on breast tissue
- Wires riding down
- Overall feeling that something isn’t quite right with your wires
Band, Cradle, and Cup Symptoms
- Wrinkles in the fabric emanating from the bottom corner of the wire
- Wrinkles in the side seam of the bra
- The side seam collapsing/ the overall band not sitting up as high as it ought to at the upper edge
- Looseness on the upper band
- Looseness at the armpit of the cups
- Straps sitting widely in the back
- Wrinkles in the back band going to the hook and eye
- Band riding up, especially in the area between the straps
- Fabric digging in at the bottom of the gore, prompting you to think about adding a gothic arch
Wow, so many symptoms from just one problem?! Sounds to me like you’re going a bit overboard here, HugsforYourJugs.
I know it may come across like I have a hammer and now believe everything is a nail, but as I wrote earlier, this method has allowed me to fit bands on a variety of people with much higher levels of success. From my own personal experience, when I started using this method of increased attention to spring my own bra makes transformed from feeling a bit dodgy and uncomfortable to wear all day to feeling like the well-fitting ready-to-wear bras I reach for every day.
A caveat:
I will say that the symptoms listed above are not solely caused by a lack of wire spring, as the wire is one single part of the entire system of the band. A lack of spring can be considered what I call a “band tensioning issue”, and the issues listed above are all symptoms of a band tensioning issue, but lacking spring is just one of the causes of band tensioning issues. It can be hard to tell which cause of band tensioning issues you’re having just by inspecting the fit. If you experience these symptoms, you should check to see if spring is the cause by manually springing your wire on the cradle, but it may not be.
How to increase spring:
1. Place your wire on the old cradle, aligning the bottom of the wire with the bottom of the cradle. This point on the wire is known as the balance point.
1.5 Lower the wire by 2mm. This is to account for the wire sitting inside channelling. The wire naturally sits on the inside edge of channelling when worn so it just needs to account for the edge of the channel.
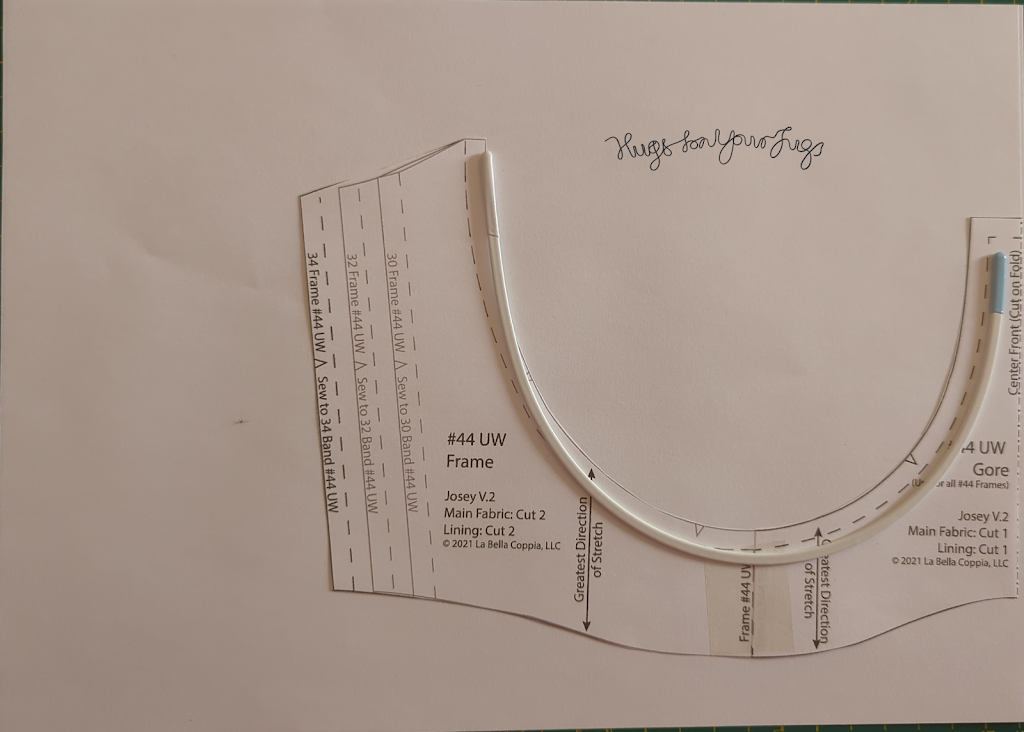
2. Counter-rotate the wire by lowering the gore and raising the armpit edge, moving the balance point outwards. How much you do this depends on the amount of spring you are going to be using. More spring = more counter rotation.
This is because when you spring the wire, the entire outer edge drops down, so this helps keep your sprung cradle shape in the correct position
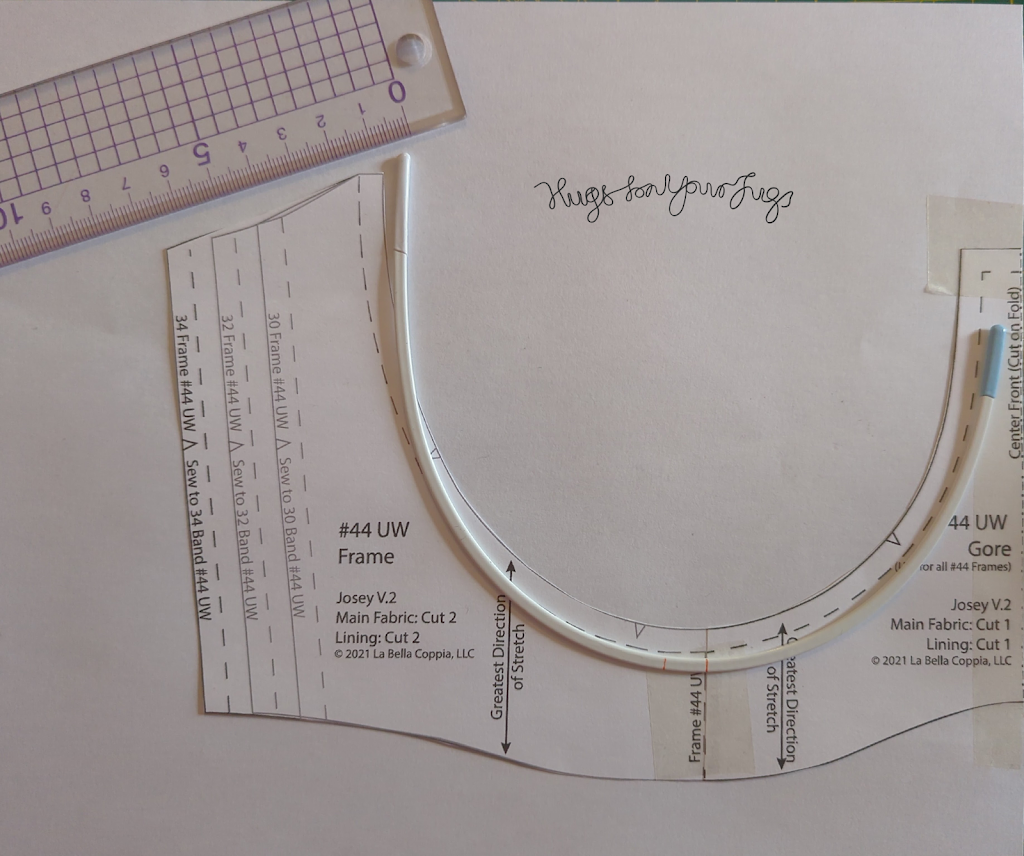 |
| Notice how the balance point has shifted after rotating |
3. Manually open the wire to the point of firm resistance. This again is a bit of an art, it’s probably more spring than you expect. The amount a wire springs depends on the snugness of your band. If you prefer a firm band, you should really go for it, but if you don’t need much support, you will be ok with less. You’re trying to simulate how much the wire will open under the tension of your band.
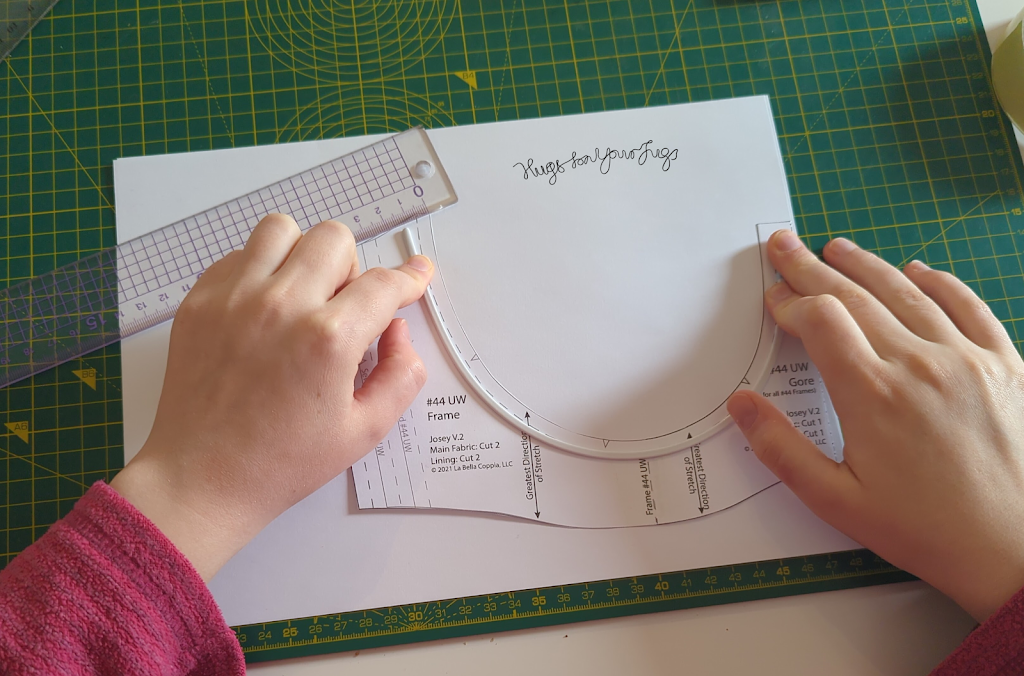 |
| The original spring on this wire is about 1.5cm. We’re going to increase that considerably. |
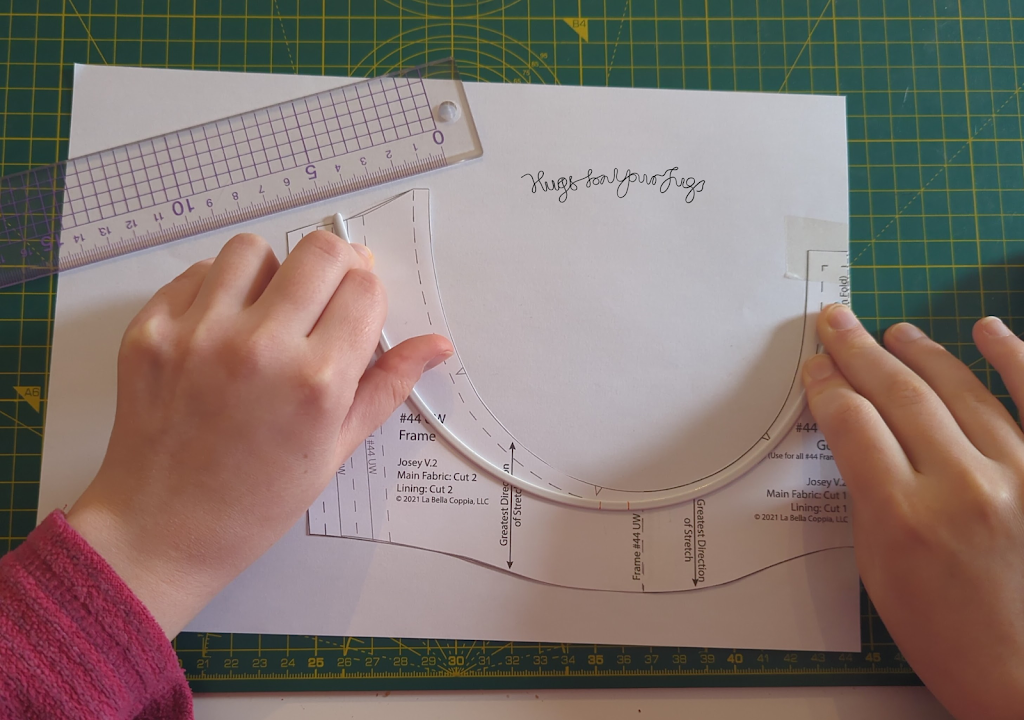 |
| I am springing this heavy duty 44V wire by 4.5cm |
4. Trace this opened wire shape. You might need an extra set of hands if you’re using a larger wire.
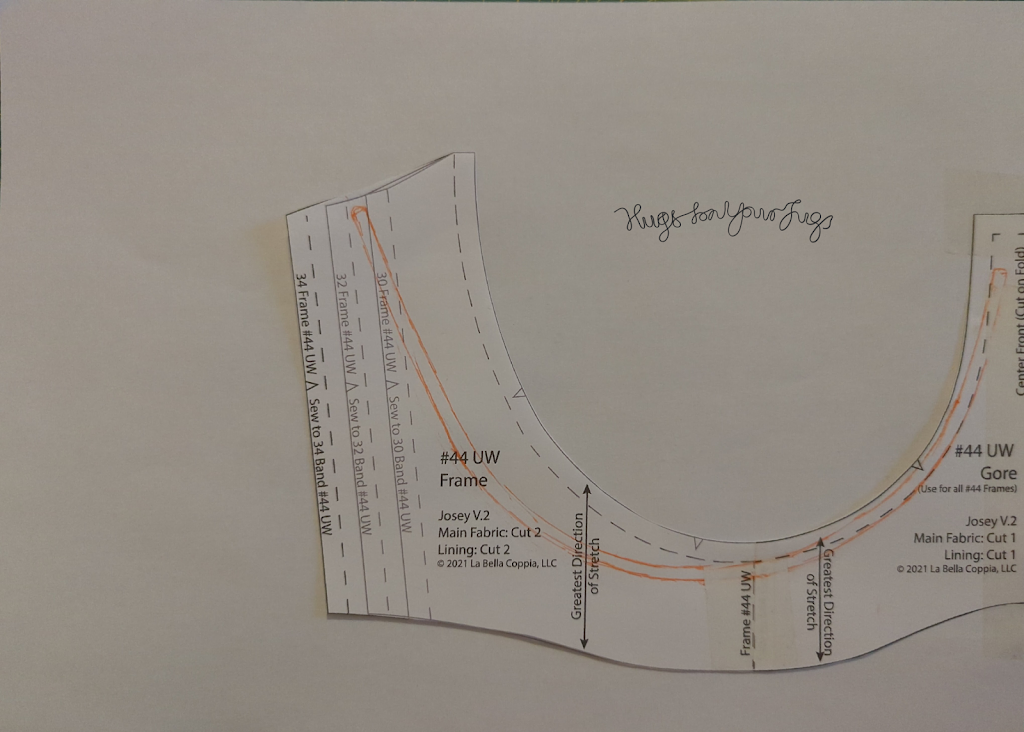 |
5. Add in about 4mm of extra space at the centre front and about 7mm of space at the outer wire tip for wire play (space for the wire to shift in the channel)
6. Trace a line 2mm inside of your wire trace, for the same reasons as in step 1.5
7. Add back your seam and elastic allowances
8. Blend the upper band edge into your original wing pattern.
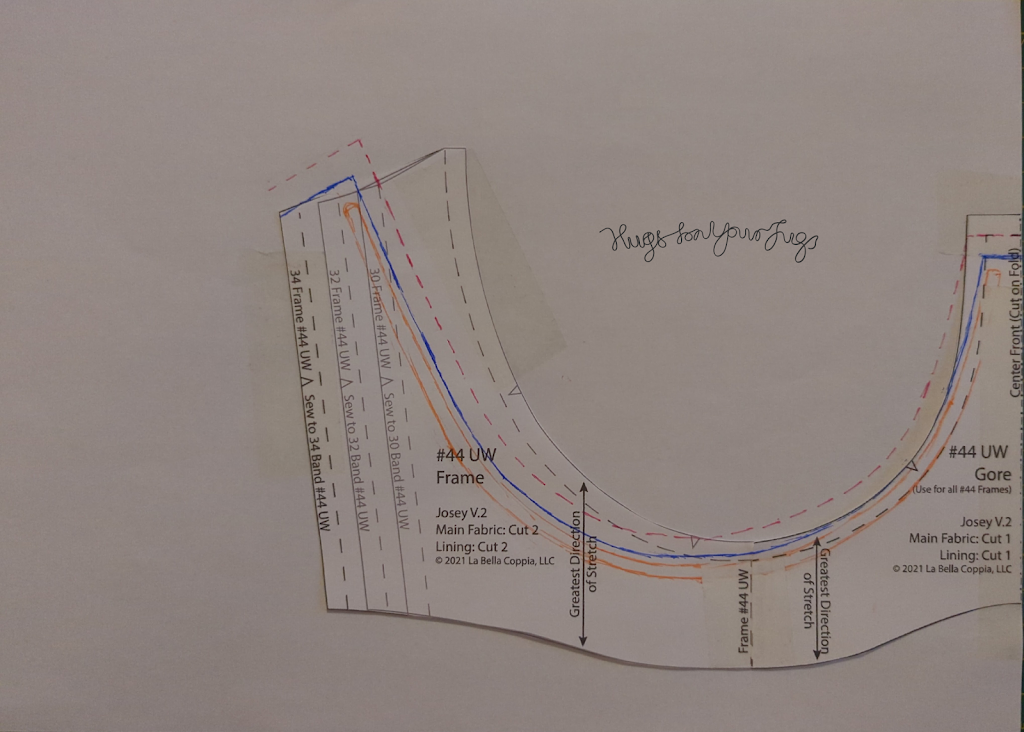
And you’re done!
Now, you may experience issues with the side seam length and position: your new cradle height may be different and the wire trace may sit outside the original side seam. These are minor issues that can be compensated for easily when blending your new cradle into your old band. If you would like detailed instructions you can take a look at the tutorial on the full version of this blog post →.
Read next
2 Ways to Widen the Lower Gore – Wire Spring vs Wire Rotation
Widening the lower gore (aka the lower bridge) is a common alteration for those with a splayed root shape, but…
Read more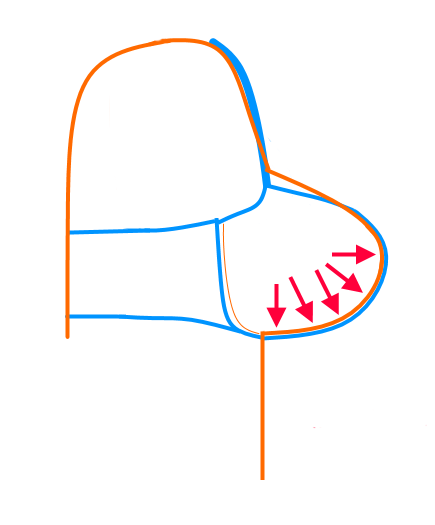
The Physics of a Supportive Bra Explained
To all boob owners reading this: I would like you to take off the clothes on your upper half and…
Read more
Leave a Reply